
Choosing Car Window Blackout Film is not just a matter of making the cabin darker. The right film should suit your vehicle, maintain clear visibility, and work properly with its windows and electronics. A sleek appearance can be tempting. Still, the glass, edges, and rear defroster deserve careful attention.
Before publication, verify a named specialist and their exact quotation; none was provided, so I won’t invent one. A useful expert principle to include is: “Choose film for safe visibility and verified compatibility, not darkness alone.” Attribute that line only if a real, qualified specialist has approved it.
This guide will help you compare film materials, visible-light transmission, heat rejection, and installation quality. It will also explain what product details to check, including manufacturer specifications and warranty terms. Look closely at the fine print. Ask how the film behaves at night, in rain, and beside defroster lines. A sample may appear darker indoors than it does in daylight, so judge it under realistic conditions.
Some details are easy to overlook. A poorly matched film can create glare, interfere with visibility, or complicate future repairs. No single product fits every car or driver. The safest choice is a film with clear specifications, professional installation guidance, and a finish that does not compromise your view.
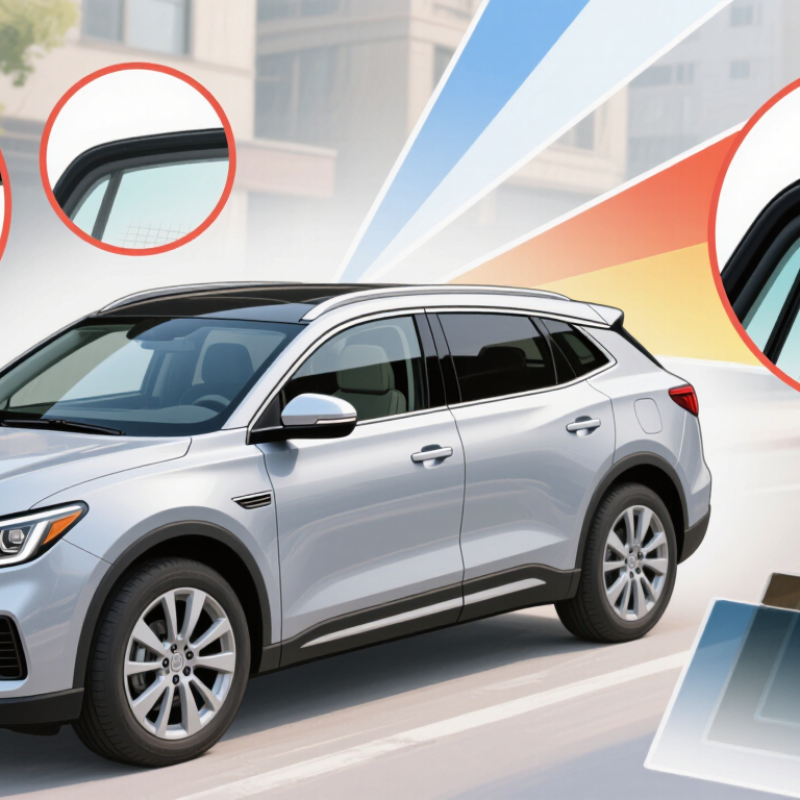
Car window blackout films differ in how they reduce light. Dyed films mainly darken the view and can reduce glare, while reflective or metallized films use a shiny layer. Ceramic films are designed to reduce heat and ultraviolet exposure without always appearing very dark. Product performance varies, so check the stated visible light transmission (VLT) and other test data rather than judging by color alone.
VLT describes how much visible light passes through the film: a lower figure means a darker window. That distinction matters. A film that blocks heat or UV does not necessarily block the same amount of visible light. Before choosing, compare a sample against the glass in daylight and at dusk; a film that looks mild indoors may feel much darker on the road. Check visibility from both sides, especially around mirrors and rear windows. Test before committing. Very dark or opaque film can make it harder to see people, cyclists, or obstacles, particularly at night. Confirm local vehicle requirements before installation, and avoid using blackout material on windows needed for driving visibility. I would not rely on a dramatic product label alone; actual clarity can vary with glass, lighting, and installation.

Choosing car window blackout film starts with an honest look at visibility, not appearance. Sit in the parked car and check what you can see through each window in daylight. Dark film can make faces and objects harder to distinguish, especially near the rear pillars. That matters when changing lanes or reversing beside a child, cyclist, or low barrier. A neat daytime look can hide a poor nighttime trade-off.
Night driving needs a separate check. Test the view after dusk, in a familiar, well-lit place, and notice how clearly you can spot pedestrians and curbs. If the image feels murky, choose a lighter option or leave that window untreated. Headlights may create glare, but darker film can also reduce useful detail. Don’t guess.
Think about passengers, too. Children may need a clear view to stay oriented, while older passengers can find dim interiors uncomfortable. Keep mirrors unobstructed, and avoid covering areas needed for clear outward vision. Before installation, ask a qualified installer how the film may affect visibility, window operation, and emergency access. I would not treat a quick daytime glance as proof of safety; it misses the conditions that matter most. My first choice might still look too dark at night, and that is worth reconsidering.
| Film Light-Transmission Range | Typical Appearance | Daytime Visibility | Night-Driving Considerations | Passenger Privacy | Safety Guidance |
|---|---|---|---|---|---|
| 70–90% VLT | Nearly clear to lightly tinted | Usually preserves a bright view through the glass. | Generally offers the least reduction in available light among these options, though glass condition and lighting still matter. | Low; occupants and items may remain easy to see. | A practical range to consider where maintaining outward visibility is the priority. Check the vehicle’s existing glass and local rules. |
| 50–69% VLT | Light tint | Often allows a clear outward view in daylight. | Can make dark roads, poorly lit areas, and reversing harder to see than with lighter film. | Some reduction in visibility into the vehicle, especially in bright conditions. | Consider only for windows where the resulting view remains adequate and the installation is permitted. |
| 20–49% VLT | Medium to dark tint | Reduces the amount of light entering the vehicle; visibility can vary with weather and glass. | May noticeably reduce visibility at night, including when checking for pedestrians, cyclists, or obstacles. | Greater privacy in many daytime settings, but not complete privacy. | Avoid on windows needed for the driver’s clear view unless local requirements and a safe visibility assessment support its use. |
| 5–19% VLT | Very dark tint | Significantly limits light and may make it harder to see through the window. | Can substantially impair night-time viewing and reversing, particularly on unlit roads. | High in some conditions; visibility into the cabin can still change with lighting. | Not a suitable default for driver-critical windows. Verify local window-tint rules before considering it on any window. |
| 0–4% VLT | Near-black or blackout appearance | Provides little to no useful outward visibility through the treated glass. | Unsuitable for driving visibility through that window, especially after dark. | Very high, but privacy does not outweigh the need for safe visibility and legal compliance. | Do not use on windows required for the driver’s view. Check vehicle and local requirements before applying any blackout film. |
| How to read VLT: Visible Light Transmission (VLT) is the proportion of visible light that passes through glazing; a lower percentage means less light passes through. These ranges describe common illustrative categories, not a guarantee of a product’s measured performance or a legal limit. The vehicle’s original glass also affects the final light transmission. | |||||
| Before installation: Check current rules for your location and each window position. Requirements can differ for the windshield, front side windows, rear side windows, and rear window. Assess visibility from the driver’s seat, including mirrors and reversing views, and avoid testing visibility while driving. If passengers may need to identify surroundings or exit in an emergency, keep visibility and access needs in mind. | |||||
Before choosing car window blackout film in 2026, check the current tint rules where the vehicle is registered and driven. Requirements can differ by region, vehicle type, and window position. Rules vary. Look up official transport or vehicle inspection guidance, not an old forum post or a seller’s chart. Confirm the permitted visible light transmission for the windshield and each side window, plus any limits on reflectivity or restricted areas.
Check the vehicle requirements too. Factory glass may already reduce light, so added film can push a window beyond its legal limit. A common oversight is checking only the front side windows. Rear windows may have different rules, but mirrors, inspection standards, and vehicle category can still matter. Keep the film’s specifications and installation receipt. Small details matter.
Before installation, ask how the film affects inspection, visibility at night, and built-in features such as defroster lines, cameras, or sensors. If a rule is unclear, contact the relevant authority and save its response. Requirements can change during the year, and summaries may lag behind. I would recheck just before booking; it is an easy step to forget. Choose a shade that preserves a clear view in rain, shaded streets, and dim parking garages.
Choosing car window blackout film safely starts with the material, not the darkest sample. Dyed film can reduce glare and cost less, but it may fade or absorb heat over time. Metallized film reflects heat effectively, yet some types can affect mobile or navigation signals. Ceramic film often offers strong heat rejection without metal, though a higher price does not guarantee better performance. That matters. A nearly opaque film can also make it harder to see pedestrians, especially at dusk.
Compare published figures such as visible light transmission, total solar energy rejected, and UV rejection. A single “infrared rejection” number can be misleading because test methods differ. Ask for test reports that identify the method and film construction. Check that product documentation states applicable safety standards, and confirm permitted light transmission for your vehicle and location before installation. Rules vary. I still find headline heat claims confusing, so comparing like-for-like test results is more useful than trusting a dramatic percentage. Inspect a sample in daylight and in a dim garage; visibility can feel very different.
Illustrative visible-light-transmission (VLT) levels—not product test results or legal limits.
VLT is the percentage of visible light that passes through the film; the blocked percentage is 100% minus VLT. These examples describe light transmission only—not heat rejection. Before choosing a film, check the applicable local window-tint rules and review documented VLT and total solar energy rejected (TSER) for the film-and-glass combination. Ask for relevant test documentation rather than relying on shade descriptions alone.
Choose a blackout film only after checking that it suits your window shape and the intended installation method. A pre-cut film may reduce trimming near rubber seals, while a roll may require steadier hands and more careful measuring. Keep the glass clean and dry, and work in a shaded, dust-free space. Follow the film maker’s instructions for temperature, cleaning solution, and curing time. If you are unsure how a panel or defroster is constructed, ask a qualified installer rather than scraping or probing it. Slow work helps. Rushing usually shows.
Tips: Use a bright lamp to inspect the glass before applying film. Remove lint with a clean, soft cloth, and avoid touching the adhesive side. After installation, look for trapped dust, lifted edges, creases, and uneven coverage from both inside and outside. A tiny bubble may be moisture that needs time to clear; a sharp crease or peeling corner may need attention. Don’t press defects aggressively, since that can stretch the film or damage the glass. Small details matter.
Let the film cure for the period stated in its instructions before cleaning or lowering the window. Then check that the window moves smoothly and that the film does not interfere with visibility or normal operation. I’d recheck the edges after a few days; installation can look finished before it has fully settled. A second inspection is worthwhile.
For an immediate response, please call this
number08045801431
Price:
