
Buying Injection Molding Equipment is not just a matter of comparing tonnage and price. The right press must fit the parts, materials, molds, and production pace you actually expect. A machine rated for 200 tons may look suitable on paper, yet still struggle with a demanding mold or inconsistent cooling. Details matter.
John Bozzelli, an injection molding process expert, is known for promoting scientific, measurable process control. A practical paraphrase of that approach for equipment buyers is: Choose a machine that can hold a stable process, not just one with an impressive specification sheet. Treat that as a useful principle, not a direct quotation. Ask suppliers for documented cycle-time data, repeatability results, service response times, and clear details about controls and safety features. Where possible, inspect a comparable machine running a similar part. Watch the clamp close. Listen to the pump. Check the molded parts.
The following ten tips offer a grounded way to compare options, from machine size and energy use to installation, training, and long-term support. Some buyers may need flexibility; others need dependable output from a dedicated press. There is no universal best choice. A low purchase price can still become the wrong number when tooling changes, spare parts are hard to source, or production stops unexpectedly. Buyers should also question their own assumptions. The machine with the most features may not be the one their operators need.
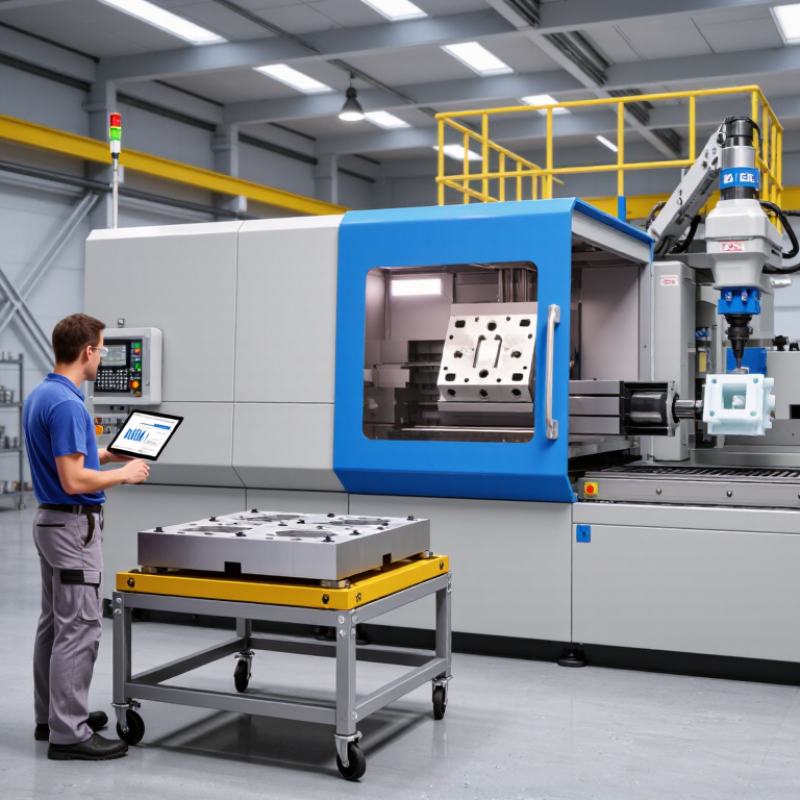
Before comparing machines, define the part, mold, and real production schedule. Record part weight, material, projected area, cavity count, target cycle time, and monthly demand. Then convert demand into required good parts per hour, allowing for planned maintenance, changeovers, and scrap. A machine sized only for peak theoretical output may disappoint on a busy shop floor.
A 2024 Grand View Research report estimated the global injection molding machine market at about US$10.4 billion in 2023, with projected growth through 2030. That market figure signals investment, not a capacity specification. For your mold, confirm shot size against total shot weight and check clamp force using projected area and the process team’s pressure estimate. Keep the normal shot within a suitable portion of barrel capacity; too little material can increase residence time and degrade heat-sensitive resins. Ask the mold designer to verify the calculation. Details matter.
Capacity planning is rarely exact. Use recent cycle-time and uptime records from similar parts, not the fastest trial run. Add a measured allowance for color changes, drying delays, and rejected starts. A spreadsheet can still lie. Revisit the assumptions after production begins, especially if the actual cycle or scrap rate differs from the estimate.

Projected mold area is a useful starting point when defining machine capacity. This chart applies a common preliminary estimate of 3–5 tons of clamp force per square inch of projected area. Actual requirements depend on the resin, part geometry, mold design, and process conditions.
Use the range for initial planning only. Confirm clamp force, shot capacity, and other machine requirements with the mold designer and resin supplier.
Injection molding machines differ in drive system and clamping design. Hydraulic models deliver strong, steady force and often suit large parts or demanding molds. All-electric machines offer precise movement and clean operation, making them useful for repeatable, tight-tolerance work. Hybrid systems combine hydraulic clamping with electric injection, but their performance depends on the actual cycle and setup. There is no universal winner.
Tip: Compare like with like. EUROMAP 60.1:2016 provides a method for reporting machine-specific energy consumption in kWh/kg. Ask suppliers for figures measured under comparable materials, shot sizes, and cycle conditions. A low number from a different test is not a fair comparison.
Check toggle and direct-clamp configurations against mold dimensions, tie-bar spacing, and required clamping force. Then review screw diameter, injection capacity, and control options for your resin and part weight. A fast machine may not improve output if cooling time dominates the cycle. I would also leave capacity headroom, but not buy far beyond realistic demand. That trade-off is easy to misjudge. Run a sample mold trial when possible, and record cycle time, reject rate, and energy use before choosing.
| Tip | Machine Type or Configuration | Key Characteristics | What to Check Before Buying | Typical Best Fit |
|---|---|---|---|---|
| 1. Match the machine to the part and mold | Hydraulic clamping machine | Uses hydraulic power for clamping and injection. Available across a broad range of clamping forces and shot sizes. | Confirm that clamping force, injection capacity, platen dimensions, tie-bar spacing, and mold-opening stroke suit the mold and part. | General-purpose molding and applications that need substantial clamping force or flexible machine configurations. |
| 2. Compare energy use and process control | All-electric machine | Electric servo drives operate movements such as injection, clamping, and metering. They can provide precise, repeatable movement and avoid hydraulic oil in the drive system. | Compare measured energy consumption for your process, repeatability requirements, available service support, and the cost of any specialized components. | Clean production environments, precision parts, and operations where consistent cycles and energy monitoring are priorities. |
| 3. Evaluate the trade-off between drive systems | Hybrid machine | Combines electric and hydraulic drive elements. The exact combination varies by machine design. | Ask which movements are electric or hydraulic, and compare cycle performance, energy use, maintenance needs, and total cost with alternative configurations. | Production that needs a balance of hydraulic capability and electric control features. |
| 4. Consider how the mold will be loaded and operated | Vertical injection machine | Uses a vertical clamping arrangement; many configurations allow inserts to be placed in the mold before injection. | Check operator access, insert-loading method, automation options, safety guarding, and the usable mold area. | Insert molding and applications where gravity or convenient access helps with placing components. |
| 5. Check floor-space and mold-access requirements | Two-platen machine | Uses two main platens and a clamping arrangement that can allow a shorter machine footprint than some conventional layouts at comparable clamping force. | Verify overall machine dimensions, mold-opening space, service access, platen size, and compatibility with the plant layout. | Large molds or facilities where machine length and mold access are important constraints. |
| 6. Compare clamping mechanisms, not just rated force | Toggle-clamp machine | A mechanical linkage multiplies clamping force near the end of the closing movement. Machine designs and operating characteristics vary. | Review mold-height range, opening stroke, clamp movement, maintenance requirements, and whether the clamping force is suitable for the projected part area and process. | High-volume production with established molds and cycle requirements suited to the selected clamp design. |
| 7. Plan for materials and processing conditions | Screw, barrel, and injection-unit configuration | Injection units differ in screw diameter, screw design, shot capacity, and material-contact surfaces. | Size the shot for the part, runner, and process; check material compatibility, residence time, plasticizing capacity, and any wear-resistant options needed for abrasive or corrosive resins. | Any application, especially those using engineering resins, recycled material, filled compounds, or a wide range of shot sizes. |
| 8. Match the number of materials to the product design | Multi-component or multi-shot configuration | Can inject more than one material or color using additional injection units and a suitable mold and control system. | Confirm injection-unit layout, sequencing controls, mold interfaces, material compatibility, and the required tooling and process-development budget. | Parts that combine materials or colors in one molding cycle, such as selected overmolded or two-material products. |
| 9. Verify capability for small, precise parts | Micro-molding or small-shot configuration | Designed around low shot volumes and precise injection control; suitability depends on the complete machine, screw, mold, and process setup. | Request trials using representative materials and molds. Review shot-size range, shot consistency, venting, temperature control, and part inspection capability. | Small components with tight dimensional or weight requirements, when validated through process trials. |
| 10. Assess automation, service, and lifetime cost | High-speed or automation-ready cell | May combine a machine with a robot, conveyor, part-removal equipment, or auxiliary systems. Actual output depends on the complete cycle and part handling. | Compare the full installed cost, cycle-time assumptions, energy and utility needs, safety integration, spare-parts availability, training, and local service response. | Stable, repeatable production where reduced handling time and dependable equipment support are important. |
Before comparing machine tonnage, verify the mold fits the press. Measure tie-bar spacing, platen dimensions, daylight, and maximum mold height. Check locating-ring diameter, ejector stroke, and the mold’s required opening distance. A mold can fit between the tie bars yet still exceed the machine’s daylight. Measure twice.
Match shot capacity to the part and runner, not just the mold’s appearance. Confirm the machine can deliver the required shot weight and injection pressure without running near its limits. Small details bite. Keep a written compatibility sheet for every candidate press; it’s less exciting than a brochure, but easier to check later.
Plan automation and the room around the full production cell. The International Federation of Robotics reported 553,052 industrial robot installations worldwide in 2022, a 5% rise from 2021 (World Robotics 2023). That growth makes robot access worth considering early: check reach, guarding space, conveyor position, and how operators will clear jams. At the facility, verify electrical capacity, cooling-water flow, compressed-air supply, floor loading, and service access. Leave room for hoses and maintenance doors. A layout drawing can still miss a real-world obstruction, so walk the proposed footprint with operators before ordering.
An injection molding machine’s purchase price is only part of its cost. Budget for installation, utilities, tooling adjustments, operator training, and scheduled maintenance. Electricity use can vary with machine size, cycle time, and production volume. Ask for estimates based on your expected parts and operating hours, then compare them with trial data. Those numbers add up.
Supplier support affects production just as directly. Ask how quickly technical staff respond, whether service is available on-site, and how long common spare parts usually take to arrive. Get warranty coverage and exclusions in writing. A low-cost machine can become expensive if a small hydraulic or control issue stops a shift. Check whether manuals, diagnostic tools, and training are included, not merely offered later.
Before committing, request a sample service plan and clarify who handles commissioning. Confirm that technicians can support your machine configuration and that critical parts are stocked within practical reach. A spreadsheet can still miss downtime costs; estimates are not guarantees. I would also leave room in the budget for one unplanned repair, even when the supplier’s forecast looks reassuring. During acceptance trials, record cycle times, reject rates, and support response details for your own comparison.
Before buying injection molding equipment, verify that its guarding, interlocks, and emergency stops suit the planned work area. Ask for the safety documentation and check that operators can reach controls without leaning across the mold space. Confirm how maintenance access is managed when the machine is isolated. Small details matter. A safety feature listed on a specification sheet still needs to be checked on the delivered machine.
Tip: Request a written installation checklist before signing. It should state floor-loading limits, electrical supply, cooling-water needs, compressed-air connections, and required clearance around the machine. Measure doorways and access routes, too; a machine that fits the production bay may not fit through the loading entrance. Clarify who supplies lifting equipment and who connects utilities. These costs are easy to overlook.
Commissioning should include documented checks under realistic operating conditions. Ask the supplier to verify installation, test safety devices, and record baseline settings, such as clamp force and cycle time. Have operators observe the process and learn the shutdown procedure before routine production begins. Tip: Agree on acceptance criteria in writing, including what happens if a test fails. It is tempting to rush this stage when a delivery is late, but an incomplete handover can leave avoidable questions on the factory floor.
For an immediate response, please call this
number08045801431
Price:
